Setting up your GeoNode project
Warning
These instructions are only valid if you’ve installed GeoNode in development mode!!
Note
If you’ve installed GeoNode using apt-get and want to customize your GeoNode then go to the Customize the look and feel of the Administrator Workshop.
This section will walk you through the steps necessary to set up your own GeoNode project. It assumes that you have installed GeoNode in developing mode.
Setup steps
If you are working remotely, you should first connect to the machine that has your GeoNode installation. You will need to perform the following steps in a directory where you intend to keep your newly created project.
Activate GeoNode’s Virtual Environment
$ workon geonodeCreate your GeoNode project from the template
$ django-admin.py startproject my_geonode --template=https://github.com/GeoNode/geonode-project/archive/master.zip -epy,rst
$ cd my_geonode
Update your local_settings.py. You will need to check the local_settings.py that is included with the template project and be sure that it reflects your own local environment. You should pay particular attention to the Database settings especially if you intend to reuse the database that was set up with your base GeoNode installation.
Run the test server
$ python manage.py runserverVisit your new GeoNode site at http://localhost:8000.
Source code revision control
It is recommended that you immediately put your new project under source code revision control. The GeoNode development team uses Git and GitHub and recommends that you do the same. If you do not already have a GitHub account, you can easily set one up. A full review of Git and distributed source code revision control systems is beyond the scope of this tutorial, but you may find the Git Book useful if you are not already familiar with these concepts.
Create a new repository in GitHub. You should use the GitHub user interface to create a new repository for your new project.
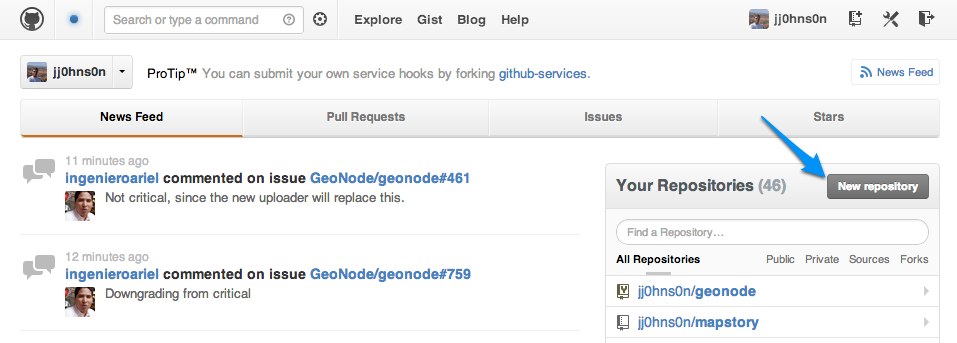
Creating a new GitHub Repository From GitHub’s Homepage
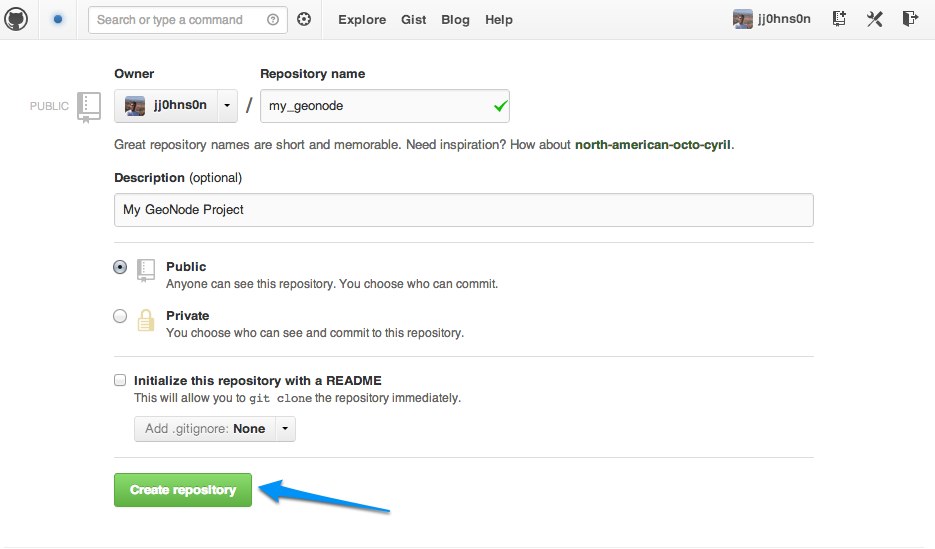
Specifying new GitHub Repository Parameters
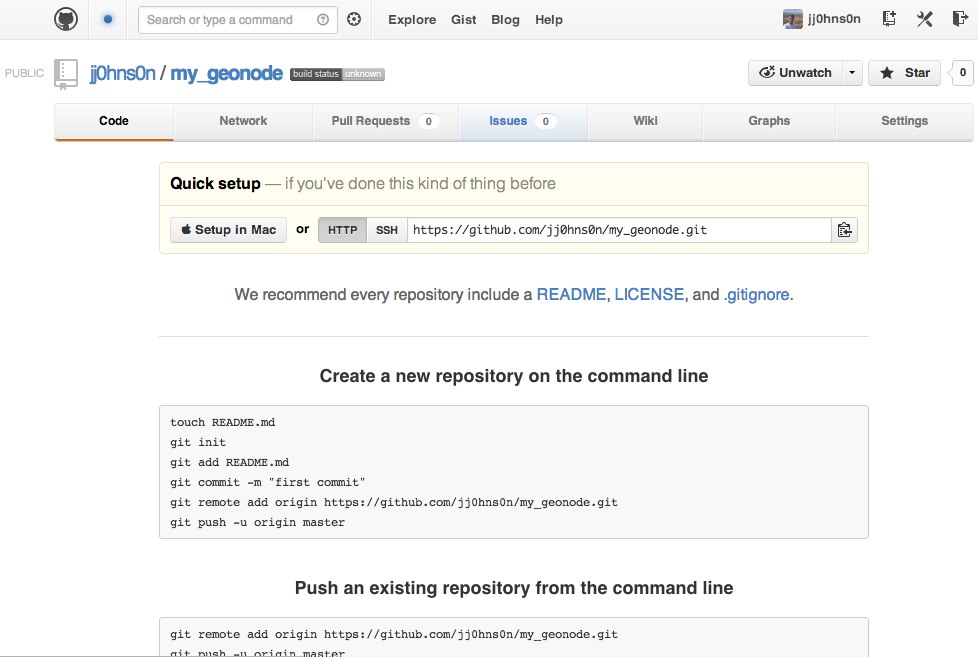
Your new Empty GitHub Repository
Initialize your own repository:
$ git initAdd the remote repository reference to your local git configuration:
$ git remote addAdd your project files to the repository:
$ git add .Commit your changes:
$ git commit -am "Initial commit"
Push to the remote repository:
$ git push origin master
Project structure
Your GeoNode project will now be structured as depicted below:
|-- README.rst
|-- manage.py
|-- my_geonode
|   |-- __init__.py
|   |-- settings.py
|   |-- static
|   |   |-- README
|   |   |-- css
|   |   |   |-- site_base.css
|   |   |-- img
|   |   |   |-- README
|   |   |-- js
|   |       |-- README
|   |-- templates
|   |   |-- site_base.html
|   |   |-- site_index.html
|   |-- urls.py
|   |-- wsgi.py
|-- setup.py
You can also view your project on GitHub.
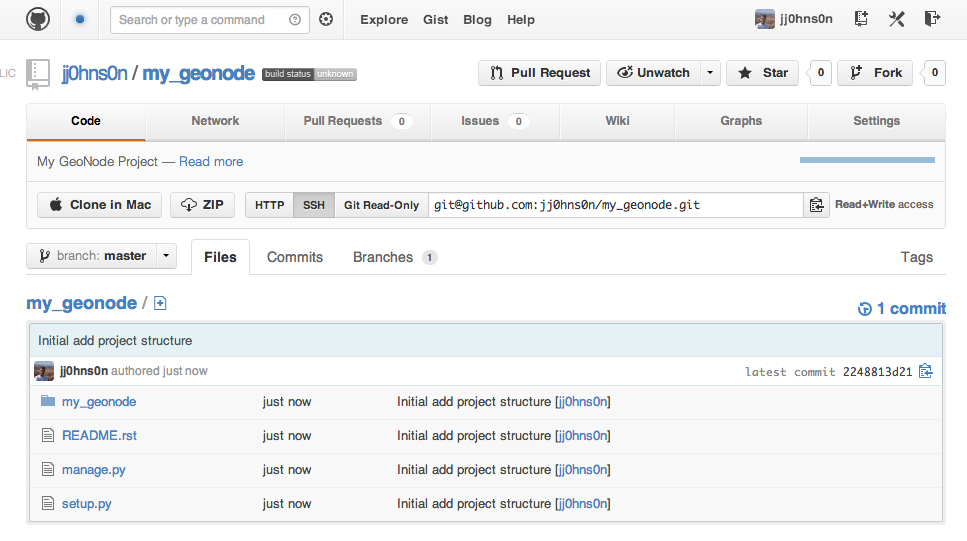
Viewing your project on GitHub
Each of the key files in your project are described below.
manage.py
manage.py is the main entry point for managing your project during
development. It allows running all the management commands from each app in your
project. When run with no arguments, it will list all of the management commands.
settings.py
settings.py is the primary settings file for your project. It is quite
common to put all sensible defaults here and keep deployment-specific configuration
in the local_settings.py file. All of the possible settings values and
their meanings are detailed in the Django documentation.
A common paradigm for handing ‘local settings’ (and in other areas where some Python module may not be available) is:
try:
    from local_settings import *
except:
    pass
This is not required and there are many other solutions to handling varying deployment configuration requirements.
Note
If you define something in local_settings.py,
take note of any dependent configuration. For example,
settings.MAP_BASELAYERS makes use of settings.OGC_SERVER.
If you redefine OGC_SERVER in local_settings.py,
MAP_BASELAYERS may need to be updated as well.
urls.py
urls.py is where your application specific URL routes go. Additionally,
any overrides can be placed here, too.
wsgi.py
This is a generated file to make deploying your project to a WSGI server easier.
Unless there is very specific configuration you need, wsgi.py can be
left alone.
setup.py
There are several packaging options in python but a common approach is to place
your project metadata (version, author, etc.) and dependencies in setup.py.
This is a large topic and not necessary to understand while getting started with GeoNode development but will be important for larger projects and to make development easier for other developers.
static
The static directory will contain your fixed resources: css, html,
images, etc. Everything in this directory will be copied to the final media
directory (along with the static resources from other apps in your project).
templates
All of your projects templates go in the templates directory. While
no organization is required for your project specific templates, when overriding
or replacing a template from another app, the path must be the same as the template
to be replaced.
Staying in sync with mainline GeoNode
If you want to stay in sync with the mainline GeoNode you have to execute the following commands. Your own project should not be adversely affected by these changes, but you will receive bug fixes and other improvements by staying in sync.
$ git fetch upstream master
$ git merge